Making the perfect cake is easy as long as you know how to. But I guess that is true for making just about everything. In this article, you will find a, hopefully, useful list with all the tips and tricks I have picked up along the way on my quest for cake perfection. I hope I will never be done learning about baking cakes, so this article will never truly be finished and I will keep adding tips along the way. If you have some tips or tricks that are missing in this article, don’t be shy and leave a comment. In the tips category of the Truthful Food articles, you can find more useful articles that will help you out on your baking adventures. But enough chit-chat, let’s get baking!

Making Cake: Before you Start
- It is always easier to work in an organised kitchen. Clean up and make sure all the dishes are done before you start. If you need something, it will be clean and where you expect it to be.
- Prepare your cake tins so everything is ready to use.
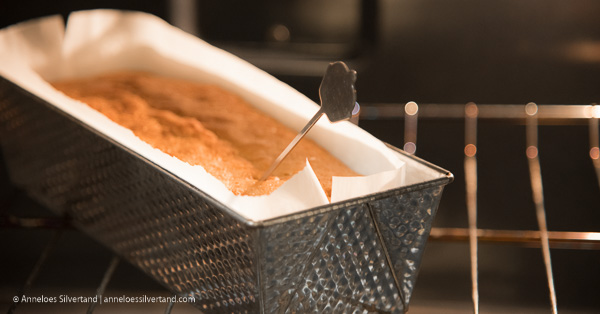
- If possible cover your cake tin with parchment paper. Check out my video on [How to Line a Square Baking Pan with Parchment Paper]! Using parchment paper will make sure you can easily remove your cake from your cake tin without leaving you with a very dirty tin to clean. When using parchment paper is not an option, put a bit of grease on the inside of your cake tin by rubbing it with butter or by spraying it with cooking spray.
Ingredients
- Make sure all your ingredients are at room temperature. This will prevent your cake batter from curdling. (An exception is when your recipe specifically mentions that you should use an ingredient while at a specific temperature.)
- Personally, I feel every so often it is worth it to buy good quality ingredients. When using chocolate, cacao powder or fruit, I can taste the difference in a lot of cakes. However, most baking addicts I know, do not have unlimited funds (if only, right?) and at some point, you have to make a choice; bake less, or not always invest in your favourite ingredients. Everyone has to make their own choice when it comes to this, but I usually compromise and invest in more expensive ingredients for cakes where it makes a great difference. If I am making a rich chocolate cake, I will use the chocolate that will bring out the flavour best. Does my cake require chocolate chips? Then I will use the cheaper chocolate chips I always have at hand.
Supplies
If you are only baking on rare occasions, it would be wasteful to invest in expensive baking supplies. If you are a frequent baker, however, I would say that it pays off to invest in some quality supplies. Some basic supplies I cannot go without when I am baking cakes are:
- A digital food scale. You can also use a manual scale, but I like the accuracy and speed of the digital scales.
- A stand mixer. A hand mixer will work just as well, but I like to have my hands free to do a bit of cleaning up or measuring while the batter is mixing.
- A silicone spatula of high quality. I hate wasting food, so I always make sure that I get all the batter out of my bowl by scraping it out with a spatula. I prefer a good quality silicone spatula, they can handle extreme heat and cold, they do not discolour when using food colourant, they are hygienic, and well let’s be honest, it’s awesome that they come in all kinds of colours.
- Cake tins of high quality. I have some cake tins of lesser quality lying around and use them every now and then. So far, however, I find they are never ‘lifelong purchases’. Because I bake a lot, some get rusty, others change shape and a many of my recipes need adjustments because the cakes bake at a different pace. The thing that bothers me most though is that I end up spending the same amount of money or more. Over the course of three years, I end up spending the same amount of money, had I bought the more expensive, higher quality cake tin in the first place.
So what does that mean, a high-quality cake tin? The material is thick, and the surface is most often shiny. These cake tins are usually of a lighter colour and will most definitely not change shape or colour after using them more than twenty times. - A cooling rack. Now, this is a luxury. You do not technically need one, but I like the result when I let my cakes cool off on a cooling rack. They are also practical when I cover a cake with a topping that will drip off.
- A proper cutting knife. It may seem unnecessary since you can technically cut your cake using a piece of string or a butter knife, but I always feel a bit sad when I make a delicious cake, and it crumbles upon cutting. I prefer to cut my cake using a bread knife, but every properly sharpened knife will do the trick. (If you don’t have a knife, a thin piece of string is not even the worst option.)
Making the Batter
- Measure all your ingredients carefully. I prefer to weigh everything using a food scale, but some recipes use measuring spoons. Either method is fine as long as you stick to the method the recipe dictates, for all measurements.
- Do not use both imperial and metric in the same recipe. If the units are mixed, convert them before you start.
- Weigh all your ingredients before you start mixing so they can be used in a timely fashion.
- Preheat your oven in time so that when you are done mixing your ingredients, the oven is ready to be used. This way your leavening agent will be active at the right point in time, and your batter will not curdle because it is sitting around.
- Sieve your dry ingredients to prevent lumps from forming.
- Use firm whisk beater(s) to mix the batter.
- Use a silicone spatula to remove ingredients sticking to the insides of the bowl while you are mixing. Make sure they get absorbed into the batter after you have loosened them.
- Mix until all your ingredients are homogeneously mixed, and your batter is smooth. Stop mixing as soon as you have reached this point. It is possible to over-mix your batter.
Adding Additional Ingredients
- When adding fruit, make sure the pieces are no bigger than a blueberry. If they are, they will influence the structure of your baked goods.
- When mixing in additional ingredients, make sure they are not just in one place in your batter before you stop mixing.

Moving the Batter
- When making a cake, either cover your cake tin with parchment paper or grease the inside with some butter or cooking spray.
- When picking the size for your cake tin, keep in mind that your batter should fill half to three-quarters of the tin.
- Use a silicone spatula to remove all the batter from the bowl when you are moving it into your tin.
Baking the Batter
- Bake your cake in the centre of the oven.
- Do not open your oven for at least the first half of the indicated baking time. Ideally, you should leave it closed for at least the first three-quarters of that time.
- Always test if your cake is done before you take it out of the oven if you are using the recipe or the oven (setting) for the first time. How? Check out my article [How do I know if my Cake is ready?].
- Depending on the size of the cake tin you are using, the baking time may vary. As a rule of thumb you can say:
– If the height of the tin you want to use is half that of the cake tin used in the original recipe, start checking if your cake is ready after half of the baking time indicated in the original recipe.
– If the volume of the batter is half that of the volume used in the original recipe, start checking if your cake is ready after half of the baking time indicated in the original recipe.
Keep in mind that it is possible an adjustment has to be made to the temperature settings when you are adapting the dimensions of the cake. - It is possible that when you are making a recipe for the first time, the indicated temperature is too high. One temperature setting is not the same for all ovens. If this is the case, your baked goods will start to brown before the inside is solid and done. You can still save your baked goods by covering them with aluminium foil. Don’t forget to make a note in your recipe that will remind you to adjust the temperature setting and increase the baking time the next time you are using it.

Removing the Baked Goods from the Tins
- Let your cake cool down a little before removing it from your cake tin. This will keep you from getting burned.
- When making a cake without covering the inside of your tin with parchment paper, slide a silicone spatula alongside the inside of your cake tin. This way you make sure your cake does not tear because it got stuck to the inside of your cake tin.
Cooling and cutting the cake
- Let your cake cool down on a cooling rack if you have one. If you don’t, just let it cool down while it is sitting on a table or cutting board.
- Cut your cake after it has cooled down. If you cut the cake when it is still hot or very warm, it will be difficult to cut the pieces in the shape you want because it will crumble a lot.

Taking Care of your Cake Tins
- If you put the right amount of batter in your cake tins, it is not necessary to wash them with soap after you are done using them. Wiping the tins down with a moist cloth should be enough. This will keep your cake tins as good as new for a very long time.
Storing
- Let your cake cool down and wrap it in plastic wrap so it will not dry out.
- Keep your wrapped up cake (slices) in an airtight container while you store it.
- Store cakes that you have frosted, or gave a filling, that contains dairy, in the refrigerator.
Shelf Life
- Cakes have a short shelf life. They taste best when eaten shortly after you take them out of the oven. If stored correctly, they will stay good for several days.
- Covering a cake with icing or frosting will prevent it from drying out. Store your iced or frosted cake in an airtight container and it will stay good for several days.
Freezing
- You can not freeze raw batter. The freezing process will destroy the structure of your batter.
- You can freeze your baked cake for several months if wrapped in plastic wrap and stored in an airtight container.
- I do not recommend freezing cakes that are frosted, iced or filled. The ingredients for frosting and filling most often do not freeze well. There are of course exceptions, but personally, I prefer to finish my cakes off shortly before serving them. That way they taste as good as they possibly can.
Did you enjoy this article? Please share it or leave a comment and follow Truthful Food on social media so that you won’t miss out on anything new!
Leave a Reply