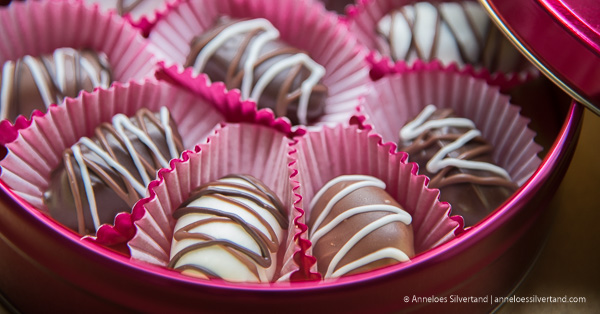
Dates are healthy and have a full flavour. Chocolate complements this flavour perfectly. Making Chocolate Covered Dates yourself is one of the most fun things you can do. It looks very fancy, and it only takes a few minutes! Try the Chocolate Covered Dates recipe and treat yourself. This recipe is one of the Truthful Living Recipe options. Are you interested in reading more about Truthful Living Recipes and what Truthful Living is all about? Check out some of the [Truthful Living articles].
If you have any dietary restrictions, always check the labels on the products you are using to make this recipe with. They will tell you if, for instance, your ingredient might contain traces of nuts, your products are made with dairy or if there is a chance the ingredients have come into contact with gluten-containing food or equipment.
Would you like to know more about what to look for when you are buying your products while you have dietary restrictions or preferences? Are you preparing food for someone who does? Check out my articles on [Food and Health] and learn more!
Do you like the Chocolate Covered Dates recipe? Please share it or leave a comment and follow Truthful Food on social media so that you won’t miss out on anything new and delicious!
Ingredients
- 150 g Medjool Dates - Don’t forget to check if you bought pitted dates!
- 20 g Milk Chocolate - [See good to know section]
- 15 g Dark Chocolate - [See good to know section]
- 15 g White Chocolate - [See good to know section]
Other Things you Need
- Food Scale
- Stove
- Cooking Pot
- Spoon - Ideally a silicone spatula.
- Bowl - Ideally a glass bowl.
- Fork
- Parchment Paper - Or cooling rack.
- Refrigerator
Instructions
- Melt your chocolate. How? Check out the video tutorial on the video page!
- Keep stirring while the chocolate is melting. Make sure your chocolate doesn’t get too warm. When touched, the inside of the bowl should feel warm but not hot to the touch.
- Either use pitted dates or cut open the dates and remove their pits.
- Put a date into the melted chocolate and take it out with a fork so the abundant chocolate can drip off.
- Repeat these steps for all the different types of chocolate you are using.
- Let the chocolate covered dates harden in your refrigerator on a piece of parchment or on a cooling rack for about 10 minutes.
- Decorating: If you want your Chocolate Covered Dates to look even better, use the different types of chocolate to decorate your dates after the first layer of chocolate has hardened. You can use a piping bag or a spoon to drizzle the decorating chocolate over the first layer.
- Take your Chocolate Covered Dates out of the refrigerator and enjoy!
Good to know
- Storing: Make sure to store your treats in an airtight container in the refrigerator if you are not eating all of them right away.
- Shelf life: The treats will stay good for several weeks if stored correctly.
- Chocolate: The higher the quality of the chocolate you use is, the better your creations will taste.
- Using melted chocolate: Often it is easier to melt a bit more chocolate than you will use. When you are done, just pour the chocolate onto a piece of parchment paper and let it set. You can use it again the next time you are melting chocolate.
- Dipping in chocolate: If you want the chocolate around your dates to be smooth, dip the dates separately. Are you in a hurry or do you just not have the patience? Put all the dates into the melted chocolate, stir till they are all covered, take them out and let them drip off before they go into the refrigerator.
- Working with dates: The taste and the mouthfeel of the dates are important. Make sure the dates you use are ripe. That means they should be soft when you squeeze them, and sticky on the inside when you cut them open. How ripe your dates are, will also influence the shelf life of your treats.
- Dairy-free and Lactose-free: If you want to make this recipe dairy free, only use dark chocolate or dairy free chocolate.
- Organic: To make this recipe organic, only use organic ingredients.
- Vegan: To make this recipe vegan, only use vegan chocolate.
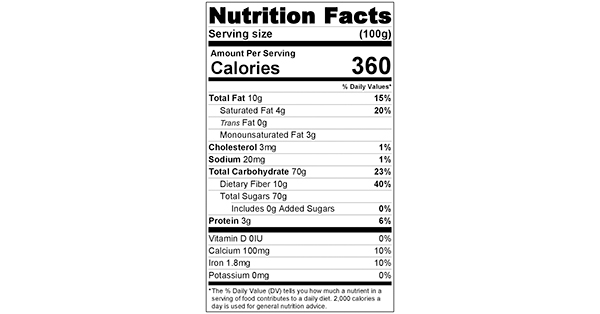
Nutritional Information per Portion
Know What You Eat
Both when buying food or when making your own, it is important to inform yourself about the nutritional value. Have a look at the nutrition label, learn about your serving size and what nutrients this product will bring to the table.
If you want to compare different products and their values, it is easier to look at a label where the values are given per 100 grams. This way you get a better understanding of the categories certain products belong to when it comes to nutritional values. Is this a product with a high sugar content? Does it contain a lot of fibre? How does this product measure up if I am looking to stick to a low-sodium diet?
Keep in mind that if you are looking to eat healthily, you should not just avoid eating fat and/or sugar. We need both in our daily diet. Make sure however to be aware of where you get your lipids and sugars from. As a rule of thumb, you could say; variation is very important in your diet and in general, the closer your food is to come straight from the source, the better.
If you want to read more about healthy food choices, check out my article [Healthy Food Choices]. Truthful Food also has a continuously growing article category solely focusing on specific ingredients and nutrients for everyone who wants to take a closer look at what you can find in your food.
*All given nutritional information is an indication. Due to differences in how ingredients are produced, where they are purchased and how the recipe is prepared, nutritional values may vary.
Leave a Reply